How to Bleed GMC Sierra Brakes: Sequence and Steps
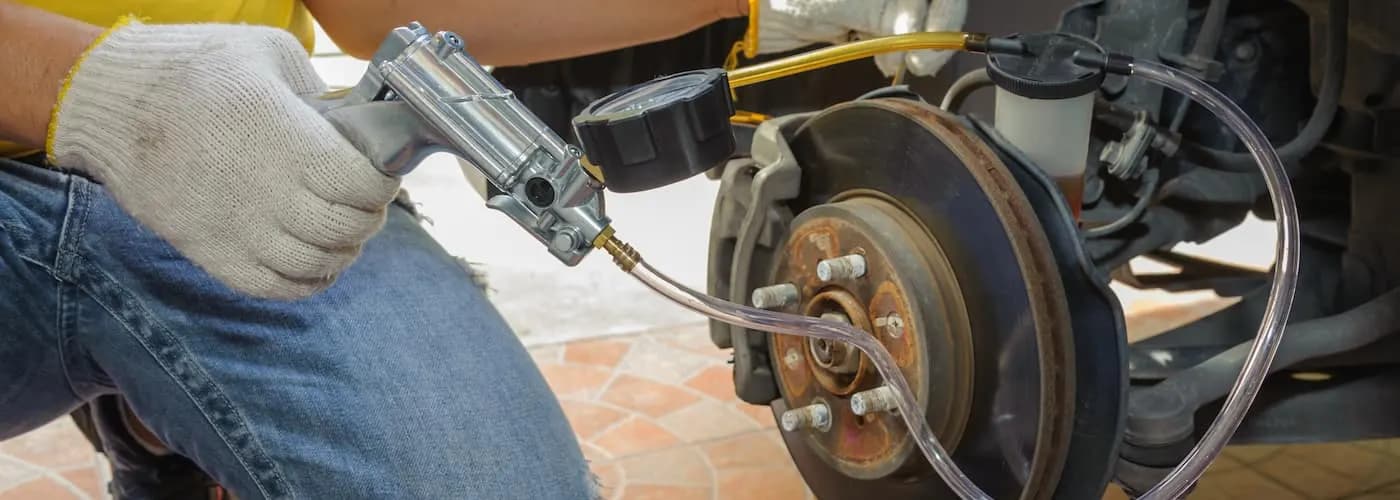
Bleed a GMC Sierra's brakes in the order right rear, left rear, right front, left front, which runs from the wheel farthest from the master cylinder to the closest, using fresh fluid of the type printed on the reservoir cap and never letting the reservoir run dry. A two-person manual bleed handles routine fluid changes and caliper or hose jobs. If the master cylinder or ABS hydraulic unit was opened, or the pedal is still soft after a clean bleed, an ABS-equipped truck may need a scan tool "automated bleed" as well.
The Bleed Sequence for a Sierra
GM trucks are bled from the longest brake line to the shortest. On a left-hand-drive Sierra, the master cylinder sits on the driver's side of the firewall, so the right rear caliper or wheel cylinder is farthest away.
| Order | Wheel | Why it comes here |
|---|---|---|
| 1 | Right rear | Longest line run from the master cylinder |
| 2 | Left rear | Second-longest run, same rear circuit |
| 3 | Right front | Front circuit, across the engine bay |
| 4 | Left front | Shortest line, closest to the master cylinder |
This farthest-to-closest order is the one brake manufacturers such as Baer's brake bleeding instructions describe as standard practice. If your truck's factory service information lists a different sequence for a specific brake package or aftermarket calipers, follow that instead. Calipers with two bleeder screws are usually bled inboard first, then outboard.
When a Sierra Needs Bleeding
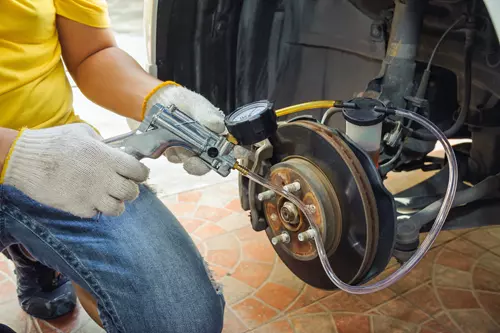
A bleed is called for whenever air may have entered the hydraulic system or the fluid is due to be replaced:
- A caliper, wheel cylinder, brake hose, or steel line was replaced or disconnected.
- The reservoir ran low enough to pull air into the master cylinder.
- The pedal feels soft or spongy and the fluid level is correct (see our soft brake pedal troubleshooting guide to rule out leaks and master cylinder wear first).
- The fluid is dark, or it has reached the replacement interval in your owner's manual.
Bleeding will not fix a pulling truck, a pulsating pedal, or brake noise. Those point to calipers, slide pins, rotors, or pads. Our brake noise chart covers the sounds.
Tools and Materials
- Jack and jack stands rated for the truck, plus wheel chocks
- Box-end wrench that fits the bleeder screws (a six-point wrench is less likely to round a rusted bleeder)
- Clear vinyl tubing that fits snugly over the bleeder nipple
- A clear catch bottle with a little fresh fluid in the bottom, so the tube end stays submerged
- Fresh brake fluid from a sealed container, of the type printed on the reservoir cap. Sierra trucks have typically used DOT 3; confirm on the cap or in the owner's manual. Our guide to brake fluid types for Sierra models covers the differences.
- Penetrating oil for bleeders on salt-belt trucks
- Nitrile gloves, eye protection, and rags (brake fluid damages paint)
- A helper to work the pedal, or a pressure or vacuum bleeder if you're working alone
Don't reuse fluid that comes out of the bleeders. It has picked up moisture and any air or debris you just flushed out.
Step-by-Step: Two-Person Manual Bleed
- Prepare the truck. Park on level ground, chock the wheels, lift the truck, and support it on jack stands. Remove the wheels if you need clear access to the bleeders.
- Top up the reservoir. Clean around the cap before opening it so dirt doesn't fall in, then fill to the MAX line.
- Start at the right rear. Clean the bleeder, fit the wrench first, then push the clear tube over the nipple and run it into the catch bottle.
- Pressurize. Have your helper press the pedal slowly with moderate, steady effort and hold it. Baer's instructions call for one slow stroke per cycle, not repeated pumping.
- Open, then close. Crack the bleeder about a quarter to half turn. Fluid and any air flow into the tube and the pedal sinks. Close the bleeder before your helper releases the pedal.
- Repeat until the fluid in the tube runs clear with no bubbles. Check the reservoir every few cycles and keep it topped up. If it runs dry, air goes back into the master cylinder and you start over.
- Move through the sequence: left rear, right front, left front.
- Final check. Snug the bleeders (don't overtighten; they are small and snap easily), fit the rubber caps, set the fluid level to MAX, and reinstall the wheels.
- Test before driving. With the engine running, the pedal should be firm and stop well above the floor. Then make a few low-speed stops in a safe, open area before normal driving.
On a high-mileage truck, many technicians put a block of wood under the pedal so it can't travel to the floor during bleeding. That keeps the master cylinder pistons out of the part of the bore they never normally reach, where corrosion and deposits can damage the seals.
Other Bleeding Methods
- Pressure bleeding pushes fluid in from a pressurized reservoir adapter. It's a one-person job and doesn't stroke the master cylinder at all, which is why shops prefer it.
- Vacuum bleeding pulls fluid out at the bleeder with a hand or air-powered pump. Air can be drawn in around the bleeder threads, so a few bubbles in the tube don't always mean air in the system.
- Gravity bleeding means opening a bleeder and letting fluid drip through. It's slow but gentle, and useful after replacing a single caliper.
ABS-Equipped Sierras: When a Manual Bleed Isn't Enough
The ABS hydraulic unit contains valves that stay closed during normal braking, so a manual bleed pushes fluid past them without flushing their internal passages. If air gets into those passages, typically after the master cylinder, the ABS unit, or a line at the ABS unit was disconnected, or when the reservoir ran dry, the fix is an automated bleed. A bidirectional scan tool commands the ABS module to cycle its valves and pump.
For GM trucks of the GMT800 and GMT900 era, the service routine commonly followed is: bleed the base system at all four wheels, run the scan tool automated bleed, then bleed all four wheels again in the same order. Menu names and exact prompts vary by tool and model year, so follow the tool's instructions. We cover the full ABS procedure, and the limits of workarounds without a scan tool, in how to bleed ABS brakes on a GMC Sierra.
Hydroboost Trucks Are Different
Many heavy-duty and diesel Sierras use a hydroboost brake booster powered by the power steering pump instead of engine vacuum. The hydroboost unit runs on power steering fluid, not brake fluid, so bleeding the brakes doesn't bleed it. Cardone's Hydro-Boost service tips describe the booster circuit as self-bleeding once components are installed correctly, with air purged through the steering system (cranking, then turning lock to lock) rather than at the calipers. If a hydroboost truck has a hard pedal and heavy steering together, start with our hydroboost no power steering, no brakes guide.
Troubleshooting Common Bleeding Problems
| What happens | Likely cause | What to do |
|---|---|---|
| Bubbles never stop at one wheel | Air drawn in around loose bleeder threads or a loose tube | Seal the threads with a wrap of PTFE tape (for bleeding only) or switch to a manual two-person bleed |
| No fluid comes out | Clogged bleeder or collapsed hose | Clear the bleeder with a thin wire; replace a hose that swells or feels soft |
| Bleeder won't turn or snaps | Corrosion, common on salt-belt trucks | Soak with penetrating oil and use a six-point wrench; a snapped bleeder usually means a new caliper or wheel cylinder |
| Pedal still soft after a clean bleed | Air in the ABS unit or master cylinder, a leak, or internal master cylinder wear | See the ABS section above and our master cylinder guide |
| Fluid is dark or brown | Old, moisture-laden fluid | Keep bleeding at each wheel until clean fluid comes through, which turns the job into a full flush |
Rusted bleeders often come with rusted lines. On older trucks, look over the steel lines while the wheels are off, and see our GMC brake lines guide if you find heavy scale or wet spots.
Frequently Asked Questions
What is the brake bleeding order for a GMC Sierra?
Right rear, left rear, right front, left front. That runs from the wheel farthest from the master cylinder to the closest. If your truck's service information lists a different order for its specific brake package, use that.
Do I need a scan tool to bleed my Sierra's brakes?
Not for routine jobs like replacing a caliper or flushing fluid, as long as the reservoir never ran dry. A scan tool with bidirectional ABS control is needed when air has gotten into the ABS hydraulic unit, typically after the master cylinder or ABS unit was replaced, or when the pedal stays soft after a thorough manual bleed.
What brake fluid does a GMC Sierra use?
The fluid spec is printed on the master cylinder reservoir cap and in the owner's manual. Sierra trucks have typically used DOT 3. Use fluid from a sealed container and don't mix in DOT 5 silicone fluid, which is not compatible with DOT 3 or DOT 4 systems.
How often should Sierra brake fluid be changed?
Follow the maintenance schedule in your owner's manual, since GM's interval varies by model year. Brake fluid absorbs moisture over time, which lowers its boiling point, so dark fluid or a soft pedal is a reason to change it sooner.
Can I bleed brakes by myself?
Yes, with a pressure bleeder, a vacuum bleeder, or a one-way check valve bleeder hose. The two-person method is the simplest and most reliable if you don't own that equipment.
Safety note: This guide is for general informational purposes. Brake systems are safety-critical — if you're unsure at any step, or the work requires specialized tools, have it inspected or completed by a qualified technician.
Related Guides
 GMC Brakes
GMC Sierra Suspension: A Smooth Ride for Every Adventure
Get the lowdown on GMC Sierra Suspension: Your ticket to a comfy, controlled drive whether off-road or in the city. Dive in for details!
 GMC Brakes
2023 GMC Sierra Must Have Accessories
Upgrade your truck game with the best 2023 GMC Sierra must have accessories. Click to find out how to enhance style & functionality!
 GMC Brakes
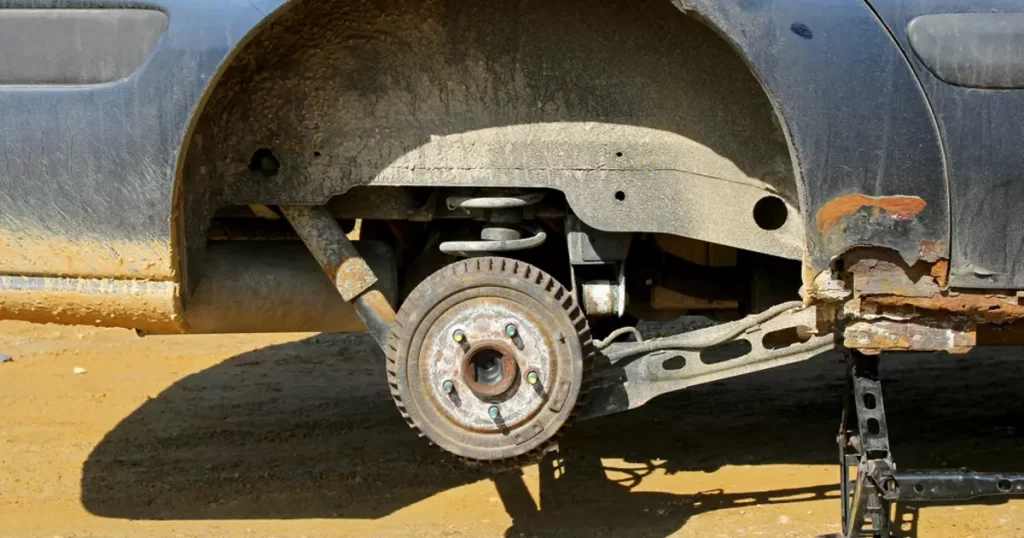
Changing Rear Drum Brakes on a 2007-2013 GMC Sierra 1500
How to replace rear drum brake shoes on a 2007-2013 GMC Sierra 1500, how to confirm your truck has drums, and how to set the self-adjuster correctly.
 GMC Brakes
GMC Sierra Third Brake Light Bulbs
Compare third brake light bulb options for the GMC Sierra, including AUXITO and Diode Dynamics LEDs, and why LEDs tend to outlast halogen bulbs.
 GMC Brakes
Rear Disc Brake Conversion for GMC Sierra 1500 (2005-2013)
Which Sierra 1500 trucks have rear drums, how bolt-on rear disc conversion kits fit, and what to check on axle, wheels and parking brake before buying.
 GMC Brakes
2004 GMC Sierra Brake Light Bulbs
Find the right brake, turn signal, and side marker bulbs for a 2004 GMC Sierra, and see how halogen and LED replacements compare.
More in GMC Brake Problems
- 2024 GMC Sierra 1500 Brake Controller: Setup and Gain
- 2023 GMC Sierra Electric Parking Brake and Flat Towing
- Top 5 Aftermarket Brake Upgrades for GMC Sierra Trucks
- OEM vs Aftermarket Brake Parts for GMC Sierra
- How to Change Brakes on a 2020 GMC Sierra (Pads and Rotors)
- How to Adjust Parking Brake Cable 1999 GMC Sierra
- GMC Sierra Brake Fluid Types: DOT 3 vs DOT 4 Explained
- 2008 GMC Yukon Brake Light Bulb Size (2007-2014 Chart)
- GMC Envoy Third Brake Light and Moulding (2002-2009)
- GMC Yukon Brake Replacement Cost: Pads, Rotors, Calipers
- How GMC Brake Systems Work: Hydraulics to StabiliTrak
- GMC Brake Maintenance: Intervals, Fluid, Towing, Winter